

Hi ladies, most of us will experience back pain at some time in our lives. The causes are so many.
They can include a herniated or slipped disc, overloaded muscles, faulty posture where maybe we're sitting all day or faulty movement patterns. Your back may not cause you any problems until you turn too fast or lifting something the wrong way.
I remember when I was running my gym when I first started our women's gym and I was doing so many classes so my body was fit and healthy but very tight.
I went in one morning to turn on the computer and I simply turned on the computer, did a little turnaround and I was locked in that position. I couldn't move. I've never encountered that before.
So it took me on a journey of learning to stretch out and learning to stay flexible right through my hips and through my glutes and that has, I've never encountered that again. So it's just one of those moments in life where I was way too tight and I needed to keep more flexible.
A Simple Reminder
Just a reminder, this post is for educational purposes only.
So if you have a back issue, you may need a really good chiropractor or a physiotherapist or an exercise physiologist, particularly one who specialises in back pain. Remedial massage therapy has been great for me. I go about every month and get un-tightened and you may be someone that needs a specialised chair with lumbar support.
So that could help you a lot. But today I'm simply looking at six exercises for strength and six exercises for mobility where we'll be targeting the core, the glutes and providing support to the spine. So let's get into it.
Watch: Back Pain Relief for Women Over 50 | Includes 12 Key Stretches & Strength Moves.
Ready, let's jump into the '12 Back Pain Relief Exercises: Women 55+' lesson:
So let's get right into it with three moves that we can do to help that body gain muscle and be the strongest you can be into your latter decades.
STRETCH Exercises:
Our stretches are on the floor today. If you don't like the floor, try your bed. Have a little pillow under your head to keep our spine in a neutral position so our head's not lying right down to the ground.
1. Supine Knee Sways:


Let's start with our first one which is simply lying on our back and we're going to be taking these knees side to side.
- So we're going to take these knees over to one side, making sure this shoulder stays down. If this shoulder comes up, we don't get the same rotational effect.
- So we really want a rotation here. So we really feel that nice stretch to the lower back and also through our hips, taking it over the other side. You'll also feel a bit of a stretch in the front of that shoulder as well.
- Now, if you wanted to extend this, you could take this top knee up a bit higher. So that just extends that rotation a bit more. If your back allows you without pain, remembering that we don't work through pain at all.
- Bring those knees over to the other side and then we're taking this top knee up a bit higher if you did want or just leaving your knees there and trying to keep the opposite shoulder down.
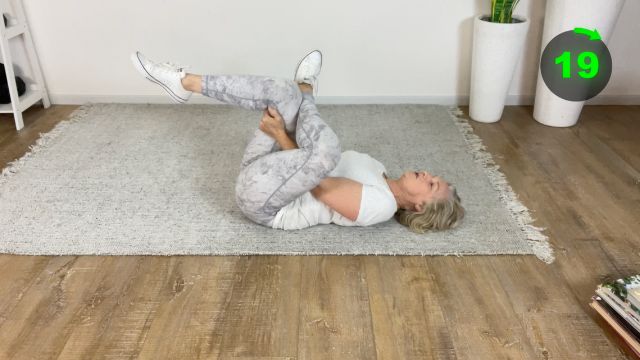
2. Figure-4 Piriformis Stretch:


The next stretch that we'll be doing is our piriformis stretch. So our piriformis runs through our glutes.
- This is very much a glute-hip one. So we're taking one foot over the other knee. Then we're going to wind our hands through that lower leg and pull this leg back as far as we can.
- So then you'll be feeling a nice stretch through those glutes and hips. You can play around with that stretch while you're here. You could be pushing that knee out a bit further, pulling it in a bit further, wherever you feel that you need that more.
- And I can certainly, this is where I'm tight all the time. I carry it through my glutes and hips. Let's take the other foot over the other knee and pull back.
3. Cat-Cow Spine Mobiliser:


So we are going to be rolling, going onto our front, onto our hands and knees, into our cat-cow position.
- So from here, our hands are directly underneath our shoulders and we have a little pull from our belly button to our spine. And we're simply going to arch up that back.
- Drop the head at the same time. Imagine a rope from your spine pulling you up and taking it the other way. Head comes up.
- Make sure you don't hyperextend that neck too much way up here. So your neck can look up, but we're mainly doing a little arch in that back and then arching up again, dropping the head. Really trying to round out that back in this position and then taking it up again.
4. Child's Pose with Side Reach:


So our fourth one that we're going to be doing is a child pose.
- So just sitting right back onto your feet, dropping your head between your shoulders and walking those hands out as far as they'll go.
- This is a beautiful back stretch. It's one that I really love. And if you want to alter that a bit further, I'll show you from me from the front.
- So I'm here. I'm just going to walk my hands around to one side. So then it gives me a nice side stretch down through my side of my back and into my bigger muscles, into my lats in the top as well.
5. Open-Book Thoracic Rotation:


So my next position here is I'm lying on my side, making sure you've got something, whether it's a foam roller under your head, just to keep your head up off the floor. I don't want your head kind of right down here. So I want some support there under your head.
- And we are going to be lying with our knees right up, kind of, yeah, about where mine are. And we're having one arm out to the side, the other arm is on top. Our first part of this is where we're just going to slide this arm across.
- And as we slide that arm across, it stays connected to us, but we look right over our shoulder. So these knees stay on the floor as well. You don't want a knee up in the air.
- These knees stay right on the floor and you'll only go back to where you can. We'll come forward again. And you can go back.
- Each time you come back, see if you can go a little bit further. Great. And we'll do one more here.
Now you obviously will go to the other side, but from here, going to make it into a bit more of an advanced one. We're going to take this arm again on top and bring this right up in the air. Follow that hand.


- Our eyes follow the hand and we can be breathing out as we bring it across, leaving those knees where they are. And you'll feel that stretch on the inside of that shoulder that you're moving as well.
- And see if you can get lower to the floor each time. So you may find that the more that you do it, the further you'll be able to get down.
6. Prone Pretzel Twist:


Now, this is one of my favourite ones that I love. It does a number of, a variety of different stretching, but it's called, well, I think a pretzel, but it was at a course that I did.
- And it's simply where we lie on our front and we bring one knee up to the side. Now, all I'm trying to do here, and you may want to have a pillow for your head, but I'm going to do it without a pillow today.
- So, I'm simply going to be here with a right leg out to the side. I'm going to be taking my left arm through. While this knee stays down the floor, I'm going to take myself back where I'm comfortable, but as far as I can.
- Now, some people only get that stretch back to here. I know that they've got a long way to go, see if you can get that arm right back. While this knee stays down, it's a lovely upper back stretch and it feels really lovely.
Now, if any of these exercises cause you pain, stop. It may not be suitable for you. Not all exercises are suitable for all people. So, you just need to be working with what your body can do.


- Now, if you did want to extend this stretch, you can actually grab that knee, grab this foot behind and be taking a full kind of, then gives me a quadruped stretch with this one and a bit of a, just extends that stretch on that side. Great.
- We're going to go to the other side with that. So, then I'll take my other knee up. I'll bring my opposite hand through.
- And while this knee stays down, I'm going to be turning over to the back. So, your aim is to not let this knee up off the floor, because if you do, you will turn right over to your back, but you're not getting the stretch to the same degree.
STRENGTH Exercises:
Let's get into some strengthening moves. So, the first move I'm going to do is going to be the hardest move. And I'm doing it first, because it's going to take a lot of thinking.

But if you can get this right, it's a really great one to work your core, your back, your glutes, and to work stability all at the same time. So, it's a horse stance. Now, think about, I'm going to take this.
Now, I'm obviously not going to be doing much with this, but showing you what I would like you to think about doing while you're here. So, when we're on our hands and knees, I'll see if I can leave that line there. This should be right on my head, my shoulders, and my hips.
And as I extend out, it should, whoops, a bit hard for me to kind of, but when I extend out, I should be able to stay in line with this rod that I've got down my back. So, just having a think about trying to stay in line with that. I know that we're not going to be doing that at home, but potentially somebody could hold that for you for a moment so you can see how you're going, but it just gives you a bit of a guide.
1. Bird-Dog Holds:


So, from here, we're going to have our wrists below our shoulders and our knees straight under our hip joints.
- We're going to draw the belly button in, and then we're going to raise one arm to 45 degrees, so that comes out a little away, and keep in the same plane as we can as the back. So, we're not having it down here, not way up here, but in the same plane, and then we're going to take out that other leg.
- And trying to hold that there with our core on. Hold for about 10 seconds if you can, then we're going to extend over to the other arm, other leg. Try and hold, core is on, and then back to that first arm and leg.
- So, my belly button is in, and I'm trying to hold out. I'm looking slightly down the floor, so I don't want your head extended up here, and then back again. This is a really good one for doing lots of different things.
- So, it works our stability, it works our core, it works our back, it works our glutes. If you find that too hard, then start off with your first slot at just doing an arm out. Trying to hold it out still, keeping that core on, activate that core, and then bring that back in, and take the other arm out.
- Then what you can do then, if you get the hang of that quite well, see if you can take one leg out. Keeping that core activated, bringing that knee in, and then taking the other one out, and the aim is we're not trying to rotate, we're trying to hold nice and strong through that whole core, and then when you get good, extend out.
- Great, and your aim is 10 seconds each side, and aim for all about 20 reps or so.
2. McKenzie Press-Up:


We'll head into the second one now. So, it's a McKenzie press up. So, from here, we are simply going to be, so face down, and we have hands just outside our shoulders.
- We're going to inhale, and then we're going to press up through those arms. Now, if you can, you're going to keep everything relaxed through your glutes, so you want to keep those glutes relaxed and pelvis stays on the ground. We're not trying to bring that pelvis up from the floor, so we're just trying to, from here, pressing up.
- Now, if you can, and you keep those glutes nice and soft, you can come right up, but keep those hips down on the ground. Don't let yourself raise up, and if you get pain with this, don't be doing it. It's not the right exercise for you, but coming back down again.
- So, as we inhale, press the body up, and exhale as we come up. Inhale, and then exhale as we come down. Inhale, exhale as we come up, pressing through those arms, just bending that back.
- Keep the glutes relaxed, don't squeeze them, and coming back down. So, we can do that about 10 times, and work up to about three sets of that. You obviously, if you've got a sore back, you won't be doing that for a start.
- You may do one or two, and that's enough, but as long as you're not getting severe pain with that, you may continue to incorporate that into your little workout routine over the next few weeks. Let's get on with the next one.
3. Glute Bridge:


So, the next one that we're doing is simply a bridge.
- So, we're going to be having our feet nice and close to our butt, our arms by our side, and we simply, all we're doing here is going to have our little core on. We're going to take a little pelvic tilt, so we're press our belly button down into our spine, into the floor, and from there, we're going to lift our tailbone up, and then take ourselves up off the floor with these hips, vertebra by vertebra. The main thing I want you to be thinking about doing while you're up here is squeezing these glutes hard.
- Imagine you've got a whole lot of wind that wants to come out, and you're squeezing those glutes hard, and then coming down vertebra by vertebra, all the way down to your back, down to the floor. Then we're going to do a little pelvic tilt again, so tilting that pelvis, pressing our belly button to the spine for a moment, while we start to lift that tailbone and bringing it all the way up. Really squeezing those glutes while we're up here.
- This is the main thing we want to activate. If we don't activate these glutes, we'll feel probably pain in our back. So, we want to get those glutes strong while we're here, and then coming down one vertebra by the other, until we're all the way back down to the floor in a neutral position.
4. Prone Superman:


So, the next one we'll be doing is rolling onto our front, and we are simply going to be taking our arms out here, and looking to the floor. Don't want you to hyperextend that neck.
- Looking to the floor, you can have the tongue on the roof of that mouth, and we're simply going to be alternating one arm, opposite arm, opposite leg, a little bit like our horse stance when we're up on our knees, but we're on the floor here. And just taking one leg up, one knee.
- Again, if you find that too hard, just lift an arm, lift an arm, and lift a leg, and lift a leg, and then when you can, start to incorporate all of it, an arm and a leg.
5. Front Plank:


From here, we're going into a plank.
- So, we're simply going to be, from our knees or our toes, we're going to be pulling that belly button into the spine. We're going to be coming up off the floor and holding, but if you did want to take those toes under, you could come up into a plank.
- Now, I'm not expecting you to stay up here for long if you've got a sore back.
- I want you to feel this more in your abdominals, and if you start to really feel that in your back, you may only stay up here for two or three seconds and come back down again, but if you're somebody that's brand new to planking, then I would certainly be just coming up onto my knees, holding, holding, holding, pulling that core in, and when you start to feel that in your back, come down. It's when you can hold that for 30 seconds or so, start to see if you can curl those toes under and coming up onto your toes.
6. Side Plank (Knee Top-Leg Option):


And our last exercise today is our simple, simple but effective side plank.
- We're going to have this elbow straight under our shoulder. Our knees will come up here. We can do this with our toes as well, but today we're going to be starting on our knees, and then we can extend that if we want to, and simply going to lift up those hips.
- So, as we lift up, we're working these obliques, and in fact, my favorite, one of my favorites at the moment is to extend that leg out because it means we're also working this glute. So, we're working these side abdominals, and we're working the glute, working the side glute, the gluteus medius, gluteus medius, and yeah, working some stability at the same time. So, you can come down when you need to and coming up.
- Now, to make that harder, you can come up from your feet here. This is going to be a harder one if you choose to lift up that leg, but you may choose to not lift up the leg and just stay up here in a side plank. This is working a lot of your obliques, so right through the side there.
- So, it's up to you whether you do that from your knees or toes, but that will certainly work along the side.
STRETCH Workout:
Click to play
Now, enjoy this stretch workout that Coach Sheree has put together into a 5 minute workout.
This stretching workout has been designed for those who particularly struggle with back pain or mobility limitations, and know they need to gain the strength and mobility to the gain freedom, independence and safety they desire.
Related posts on back mobility release, Click Image/Link


STRENGTH Workout:

Click to play
Now, enjoy this strength workout that Coach Sheree has put together into a 5 minute workout.
For a WARM-UP do the stretching workout routine that preceded this workout
This strengthening workout has been designed for those who particularly struggle with back pain or mobility limitations, and know they need to gain the strength and mobility to the gain freedom, independence and safety they desire.
Final Thoughts
Thank you so much for joining me today. I hope that that's going to help your back to a degree.
And remembering you always work within the capacity of what you can. If you're in pain, you experience pain with any of these exercises, stop immediately. Maybe go into something different.
Maybe have a stretch out in between doing the strengthening. But if you just take little snippets at a time and your back is okay with it and you don't experience immense pain, like acute pain, then that could be a good one for you. Maybe you're weak right now, but you can build up to that and really be helping to strengthen that back.
Whatever you can, I think having a strong back is a mighty thing to take you through life. So, see how you go with it. Let me know how you're going.
Stay Strong.